Crafting with Crate Paper Standouts

Hi everyone, it’s Nat here!
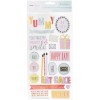
My blog post today focuses on one of the embellishment series from Crate Paper that I often end up adding immediately to my wish list as soon as the sneak peeks of a new collection go live!
If you’ve not seen them before, Standouts are layered embellishments that usually are really dimensional and add a lot of pop to your project. They are fab especially on projects that aren’t behind a page protector allowing you to see the full effect, so on cards, home décor projects, special gift wrapping/gift boxes.
Because they are so dimensional I want to give you fair warning that if using them on card projects they are best for those special cards you are hand delivering!
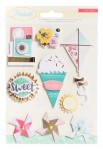
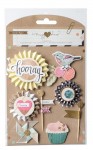
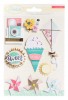
The Standouts that recently made my wish list in the recent Crate Paper releases were from the Poolside collection and from the Maggie Holmes Confetti line.
As you can see there is plenty of scope for using these on all manner of items. I combined them with papers from recent Crate Paper releases: Poolside, Maggie Holmes Confetti, and Craft Market and a few other items in the shop.

And as is typical for Crate Paper collections, although each line has its own unique look, the collections work together very nicely.
So, onto the projects I made with these Crate Paper Standouts!
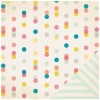
I started off in the sunny land of the Poolside collection – I immediately wanted to make something using that fab ice cream sticker!
 I used the aptly named Sun-n-Fun paper for the background, but rather than have a flat background I wanted to to be a bit more fun and interesting. So I used a scallop border to cut a number of strips from the paper and layered them up on a card blank.
 It adds a bit of texture without making everything look too busy. I had that Thickers sticker left over from my Dear Lizzy Fine & Dandy projects last month and it was just perfect for this card! A couple of gold enamel dots thrown in for good measure and the card was done.
Next I had my eye on the kite sticker – I was thinking there was definitely room to do a little cloud and sky scene in the background using the patterned papers laid out on my desk, and it might be rather surprising what I chose. But I also wanted to incorporate some of the Anniversary Gold glittered paper in the Confetti collection.
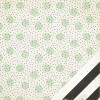
 I used the glittered paper as my main background. To create my little scene I used a journaling card die to cut the Stitching paper in the Craft Market collection for my blue sky, and then I wanted some clouds that would really stand out and the spotty design on the Garden paper from the Confetti line was fab for this.
 The greeting is stamped onto a scrap of the B-side from the Sun-n-Fun paper I used for the previous card. Oh and that little sun on the sheet of Poolside Standouts makes an appearance, can you see it peeking out from behind the kite?
The next sticker from the Poolside Standouts I wanted to use was the camera. I always love these camera accents which obviously are aimed at scrapbooking, but I think they are a great way to get “Smile!” onto a card too.
This next card uses lots of bright colours:
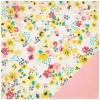
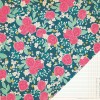
 This card uses some really sunny papers from the Poolside collection. I loved the floral print of the Summertime paper, and again the B-side of the Sun-n-Fun paper came out to play. There’s a fantastic wood-like pattern in the Poolside collection called Lawn Chair. I used that for the speech bubble cut with the Jen Hadfield Cottage Living dies – I positioned the die so that it looked like a sunburst pattern was in the background. Just a tiny detail, but it makes the sentiment pop out a bit more. Also the B-side of the Lawn Chair paper features the navy and white diagonal stripes you see there – great for border.

As you will know by now, I am a big fan of framing accents in die-cut apertures, and this card is no different. I really wanted to showcase that camera sticker so used a circle die with a pinked edge for the aperture this time. And I loved the bokeh effect of the dot pattern on the Fresh Paint B-side in the Craft Market collection. I added a bit more pop to the card with enamel dots, and the flower Standouts from the Poolside set, plus I had a little scrap of the glittered paper lying on my desk, so I created an arrow by trimming one of the glitter lines and making it point to the camera.
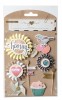
My attention then turned to the Maggie Holmes Confetti Standouts and in particular the rosette accents! I do love a nice rosette!
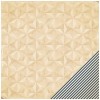
On my desk I also had some other Speciality paper from the Confetti line – the Ceremony gold foiled paper.
I wanted to give a special mention about this paper and the glitter paper, but especially this foiled design. These papers are heavier weight than other speciality papers I have had in the past. The Ceremony gold foiled paper in particular feels closer to a thin cardstock than your regular paper, and as such it is fantastic for what I’m about to show you:
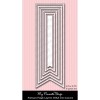
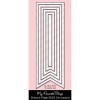
 Boxes and décor items with scored lines that need to be neatly folded! This little pillow box was cut with a die and assembled. It’s really easy to put together and looks very professional – a lovely bespoke gift box for giving jewellery or small keepsakes. I jazzed up the Hooray rosette with a couple of spotty tails cut with the Fishtail die sets by My Favorite Things (grab them while they are still there and on offer!). These were actually cut from the lines of dots on the B-side of the Life of the Party paper in the Confetti line.
Next up, I was itching to really go to town with a dimensional card – I really wanted to use the bold patterns and colours from the Confetti collection on a larger card and also incorporate that cute little bird Standout sticker.
 Well, there was plenty of 3D foam tape used in the making of this card! There are quite a few layers, starting with the background…
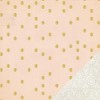
- I covered a 5×7 card blank with the lovely mint dot and spotty Blast paper.
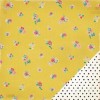
- Then I cut a piece of paper from the Centerpiece paper as a mat and notched the corners with my trusty green Corner Chomper.
- I stamped the fancy greeting on the B-side of the Centerpiece paper, it’s got a nice lined notepad look to it.
- Then I cut an aperture in a left-over piece of the Garden Party paper I used earlier that would ultimately fit inside the frame die I’d chosen.
- I finally chose the B-side of the Fete paper as the perfect pattern for the frame die from the Jen Hadfield Cottage Living set I set my eyes on, but I rotated the paper when cutting the die to get more of the zigzaggy look on the thinner parts of the die-cut frame. Who knew it would make such a difference, but it did!
- I assembled the frame over the spotty aperture and over the sentiment with a layer of 3D foam tape between each piece, then with the magic of double-sided tape I fixed the whole thing to the floral background on the card and finally…

….I added the little Birdie Standout sticker in the corner, oh and let’s not forget those enamel dots!
It is possibly the most 3D-foamed card I have ever made, but it is definitely packed with dimension.
And finally, here’s a more masculine card since Father’s Day is coming up, I thought the Confetti Standouts would also work on a manly card.
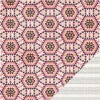
 I used the blue rosette paired up with the the Poolside Lawn Chair paper (A and B-side) and the Craft Market Stitching and Craftsman papers.

There’s also another Standout accent used here, the little banner flag, which I added a glitter pretzel to (Of course! Who wouldn’t?!) and popped it in that bottle of beer.
I still have some great accents left from the Crate Paper Standouts I used, including those fab pin wheel stickers. I have ideas for those, plus that little cupcake sticker in the Confetti set is going to be perfect for any upcoming birthday cards I need to make!
Have fun crafting with your Standouts!
