Round in circles with MME Jubilee!
Hey Little Magpies! Welcome to July. I can not believe we are halfway through 2015 already. This month I chose a really bright and cheerful range from My Minds Eye, Jubilee. The best news is, the whole line is in The Sale so it’s all at least 50% off! I ordered a selection of papers, some of the 3×4 Cards and also some Flair Badges. I wanted to focus on using circles this month since I did grids last month but wow, I should have stuck with the straight lines I think, I really struggled with circles! I think my graphic designer brain works much better with straight lines and grids but I managed to pull together 4 LO’s for you.
The first one is very simple, I just wanted to use spotty paper! I actually started with the LO I’ve put last here and had some struggles with trying to use spotty paper on that one, I have provided photographic evidence! So after the trauma of that LO, I went simple with this one which I made second. I just used the spotty side of the Sherbet, Happy, Ombre paper. I used one of the chipboard stickers from MAMBI Chipboard Value Pack, Chalk Sweet Memories beside the photo. My title is done using old Thickers from my stash and one of the fab puffy stickers from the Seven Paper Baxter line. I’ve made a little embellishment cluster on top of one of the vellum hearts from the Baxter Vellum Die Cuts pack and layered up some punched circles, an exclusive HLM Flair Badge and some of the phrase stickers from Shimelle True Stories, Phrase & Alphabet Sticker pack. The phrases on that sheet are quite useable. I have also added some red Self Adhesive Rhinestones below the title and some Hey Little Magpie Dewdrops in clear above the photo.

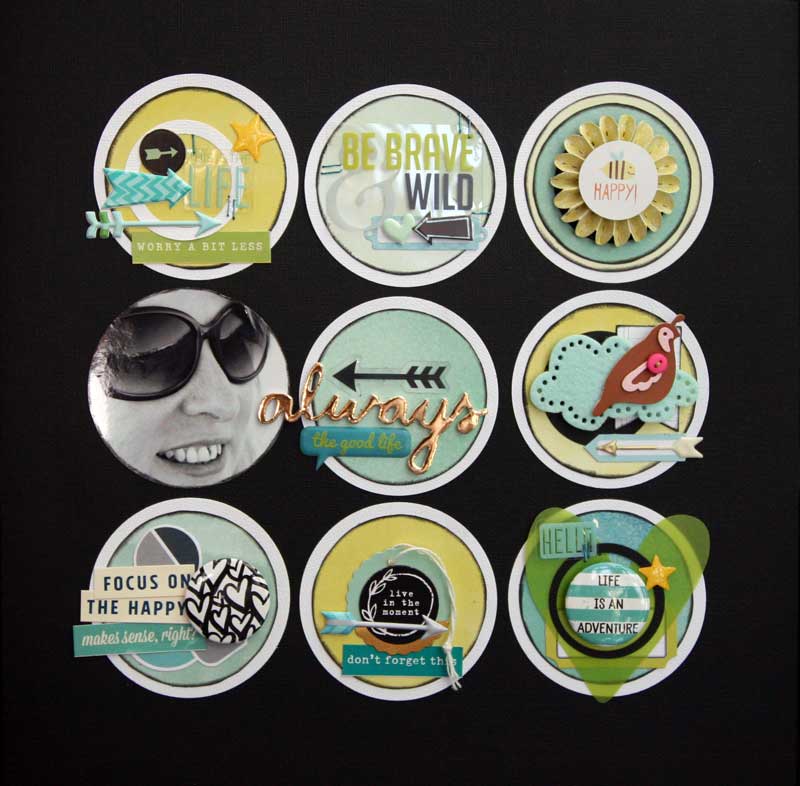
My next LO, I decided to stick with a grid but using circles instead of squares. It didn’t really work as well as I wanted it to but it’s ok. I actually started another version of this and learned that I needed to put the coloured circles, on top of white to make it work properly. So I punched 8 white circles and one photo with my 3″ circle punch. The smaller, patterned paper circles, I drew with a compass and hand cut because I didn’t have a punch the right size, which is why I inked the edges to hide any dodgy cutting mistakes. Inking the edges is always a great way to cover any little imperfections. I used the plain coloured sides of the following papers, Sherbet Happy Ombre (I used the yellow spot side of that one above), Sherbet Enjoy Sunshine, Wild Berry Life Diamonds and Wild Berry Hey You Gardens. I loved the fresh colours of these ones together. Then I layered up my circles and started embellishing them. If you want to know what any specific embellishment is, please leave a comment and I will let you know. I did raid my old stash for a couple of things, namely the American Crafts ‘Details’ which are on the top and middle right hand circles. I’ve also used some De Cut embellishments from Heidi Swapp and a few circles I punched myself to make rings. The Flair badges were from the Jubilee line but they’re unfortunately out of stock now. I’ve also used my favourite Puffy Arrows from MAMBI, some chipboard circles from the Chipboard Value Pack, Chalk Hello Friend. As above, I’ve used some of the phrase stickers from Shimelle’s Phrase & Alpha Stickers and another vellum heart from the Seven Paper, Baxter Vellum Die Cut Hearts pack. Those hearts are so lush and such pretty colours.
This next LO was actually the last one I did, and the one below was the first! I have to thank my fellow DT member, Agnieszka Betkowska for her post in June, I hate gold! I was totally stuck for something else to do involving circles and her ‘Best Ever’ LO inspired me! I came up with this LO, inspired by her LO with all the layers of circles . I used the awesome Crate Paper, Craft Market Wood Veneer Embroidery Hoops as frames and then added my photo on top of one. The Embroidery Hoops are great, there’s 6 in the pack and they’re only £3.99 and I don’t think you have to use them on a LO connected with sewing or stitching. They work so well as frames in my mind! Again, I struggled to pick the right papers and I ended up cutting quite a few circles and then replacing them with other ones! The papers I settled on were Sherbet Happy Ombre again, that yellow spot was one of my favourites! Sherbet You Precious, Wild Berry Love Stamped, Wild Berry Today Sketch and then I used the purple and green stripes papers which have both sold out now in The Sale unfortunately. I also used the Chipboard Shapes from Jubilee as the Flair Badges which have sold out too, sorry about that. There’s also some round chipboard shapes from the MAMBI Chalk Hello Friend Sticker Pack. The rest of the embellishments are just circles I punched from the various papers I used, mounted on foam pads for height. I also made 3 handmade flowers to add a bit more ‘circle’ interest!

So my last LO, was actually my first, and after all my struggle with this one, it ended up being one of my favourites! I used the Embroidery Hoops from Crate Paper Craft Market again and this time I coloured around one half of the edge with black Sharpie to make them a bit different. I layered them in the pattern I wanted and then added foam pads to the back of the two smaller ones so they would sit over the top of the large middle one. I put my journalling in the small hoop, my photo in the middle sized one and I backed the largest one with the black and white striped Wild Berry Love paper. After all my pfaffing around which I talk about below, I embellished with a selection of buttons from my stash, stars from Freckled Fawn Enamel Stars Neon, Hey Little Magpie Exclusive Flair Badges, Selfie and Yellow Polka Dot. I’ve dotted around some of the stars & hearts from the Seven Paper Baxter Puffy Shape Stickers and used a Heidi Swapp Wood Veneer for the word journey in my title (I am not sure if I’ve used that one, or possibly a smaller sized one from a pack of wood veneer, I can’t remember sorry) and I coloured it black with a Sharpie and then put a few layers of Glossy Accents over the top to make it super shiny. I don’t know where the letters I used for home came from, I think they might have been Freckled Fawn from a few years ago but I had to go through my whole entire stash to find exactly the right size to fit between the descenders in the journey word! I then painted them yellow and added Glossy Accents on top.
To finish things off, and also to tie in with the embroidery hoops, I sewed a double circle around with embroidery thread. I drew the circles with my trusty compass and then poked holes with a pokey tool. I did the holes a little bit close together on the larger, pink, circle so I learned to put them a bit further apart on the smaller, yellow, circle. It did take ages to do but I think it was so worth it in the end and it did even inspire me to add stitchng through the holes in the buttons as well – something which I’m usually far too lazy to do!

As I said, I do have a story about this LO. I really, really struggled with it! It was the first LO I did for this blog post, and I had wanted to use a spotted background, because I was using circles this month. So tried. I really tried! The first 4 LO’s from left to right below, was me trying different things. Nothing looked right. So I took photos and asked some of my friends and my Mum which one they liked best. I liked the one with the yellow spotted large cirlce. They all liked different ones and nobody liked the one I did lol! So this LO sat on my desk, getting shifted from one large circle to another and nothing working for me. So I thought I know, I’ll put it on a white background. Then it worked!!! I took a photo of it with a large vellum circle and also plain and everyone agreed that the plain one was best. Hallelujah! So that’s what I stuck with and went on to add the stitched circles and a few other bits and bobs. But I wanted to share my struggle to use a patterned background, it doesn’t come easily to me, everything looks so much better on plain white to me. I have full admiration for those scrapbookers that can rock the patterned backgrounds, like all the rest of the DT girls, but it doesn’t work well for me lol! I always struggle to use a patterned background, and these photos show my strugle!

I wanted to also highlight the awesome value, Sticker Books from MAMBI. I have long been a fan of the Puffy Stickers in the MAMBI and use them on pretty much all of my DT LO’s because they’re so versatile and affordable. I decided to branch out and bought one of the Sticker Books. I think I started with this one, Chalk Tourist and was realy surprised to find that there was 5 pages of stickers in pack! So I ordered a few more of the books and was nicely surprised with how many stickers you get, and the designs. I’ve photographed all the stickers you get in 2 of the packs here. On the left is the Chipboard, Chalk, Hello Friend pack and on the right is the Chipboard, Chalk, Sweet Memories. These ones are both chipboard stickers, so they’re thick. Some of the packs are stickers, some have glitter and some are foiled. So there’s a lot of variety. But I wanted to make sure everyone was aware, that there’s more than one sheet in the packet. Oh, and some are missing from my sheets because I used them on these LO’s! I like that they come on clear acetate sheets cause then I can cut the whole sticker/chipboard out and position it on my LO to see if it works, before I adhere it. So for either £3.99 or £4.99, I think these sticker books from MAMBI are great value!


So that’s it from me for this month. I hope you all check out all the awesome sticker books that MAMBI have and realise they have more than one page to them (I didn’t know before!), and check out what’s left of the Jubilee line in The Sale. Have a great July Magpies!
