Stargazer from Dear Lizzy
Hellooo to you all! Jen here on the blog today. This month I’ve been working with the delightful Star Gazer collection from Dear Lizzy for American Crafts. This is a really fresh collection with an adaptable colour palette and lots of lovely motifs for your pages, cards or other papercrafting projects. It also features the most amazing giant chipboard titles – they are seriously huge, and a fantastic statement piece for your layout. I wanted to use these in different ways on my pages this month, so I have three different finishes to share with you. I’ve also used only one 12×12 paper sheet, and the other papers are cut from the 6×6 paper pad.

The first thing I tried was using mist. The titles come with a white finish, and I wanted some of that to show through, to give a slightly worn look. I sprayed plenty of gold mist (I love the Heidi Swapp mists) onto the chipboard and then used some kitchen roll to dab off the excess. I did this a couple of times, so that I had various layers and depth of colour. Then I waited! All that mist made the chipboard a little soggy, so I didn’t want to risk it tearing whilst it was wet.

This photo was taken at a Harry Potter themed escape room experience in London (if you enjoy puzzle solving and solving cryptic clues then I can’t recommend escape rooms enough – such a fun thing to do!) where we “graduated” top of the class. If you’re a Harry Potter fan, you’ll appreciate the excitement when we donned our house robes for a photo! I always include stars in my pages about the magical world, so I used two big shooting stars for a statement, and then lots of little stars from Star Gazer, along with some from Shimelle Glitter Girl.

I framed my central column of papers, photo and title with lines of Nuvo Crystal Drops in Navy, embracing the haphazard approach and roughly following the lines of the angled papers. I have also added a strip of the navy/teal washi tape from Glitter Girl, which coordinates just perfectly with these papers.


For my second page I opted for a different colour palette from the collection, and kept only the blues, greens and yellows and avoiding adding much of the oranges and pinks in the range. This gives the page a totally different look when compared to the first, in which I used quite a bit of pink! This photo is from the summer, when my oldest son is lucky enough to enjoy time on the river with his beavers group. “Adventure” seemed the perfect word to use, and to create a different look I chose to position it running vertically rather than horizontally on the page.

I went Nuvo crazy on this one, and coated the entire, almost 12″ word, in copper Nuvo crystal drops. I was not quite sure how it turn out, so it was a bit of an experiment, but I’m pleased with the final result. It has an almost woodgrain quality to it, with the various tones and texture that has been created by moving the liquid around on the shape with the nozzle before it dried.


I opted for straight lines on this page, and cut several rectangles of various sizes from papers, adding them around my title and photo. Even on this kind of page I don’t do any measuring or using of a ruler – I just wing it and do it by eye. Life’s too short! I actually love this kind of grid design, as it lets me use plenty of embellishment clusters to join up the papers – I try to make sure that each one is touching something else, and not “floating” on it’s own on the page.


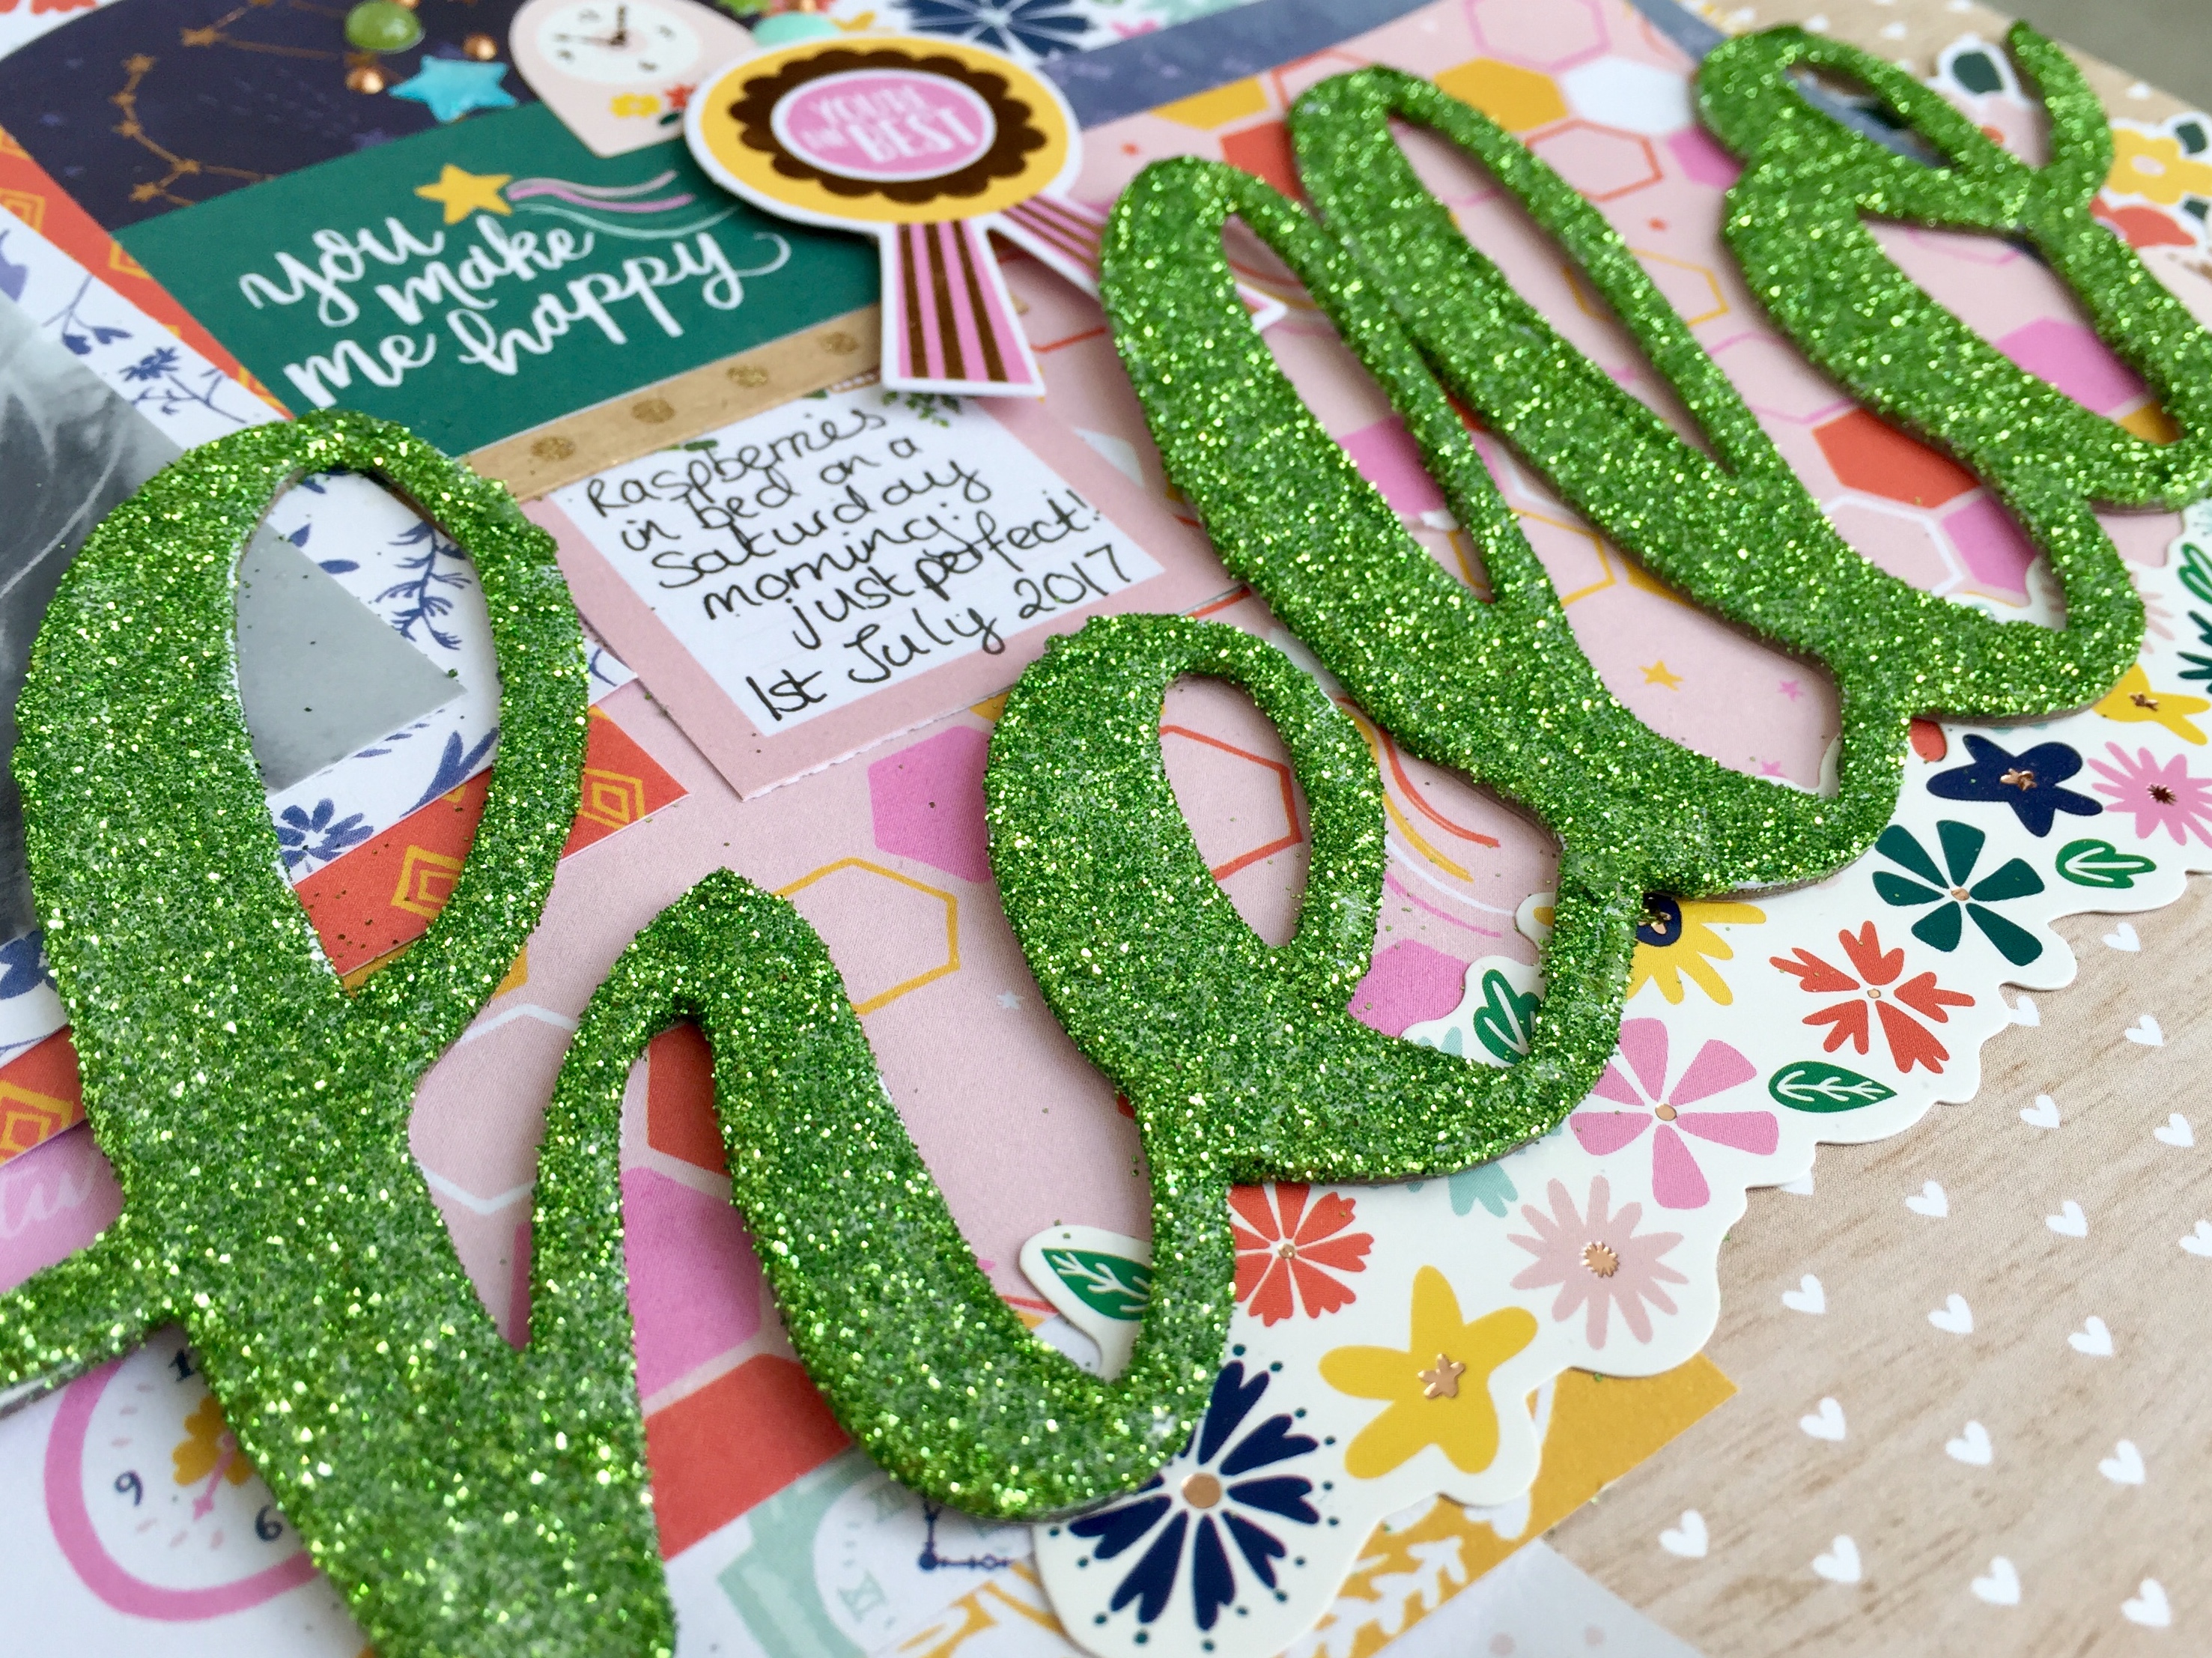
For my third chipboard finish I opted for glitter. When is glitter not a good choice?! Never. That is the answer. Glitetr is always a good choice! I think I love this one the most. I just used wet glue and loose glitter, and yes I was covered in glitter for several days afterwards despite washing it off! I picked a colour that was in the collection, but not predominant, so that my title stood out even more boldly on the page.

This time I went all out and used all of the colours. I layered up papers from the 6×6″ pad onto the background sheet (my favourite paper in this collection!) and just kept adding pieces until it looked done to my eye. I tend to stick as I go, but I do use re positionable Herma runners. If I was using a more permanent glue I would arrange it all first and then take a photo in order to refer back to it as I stuck it down. I do find myself peeling layers up and moving things around quite a bit!

I used bits and pieces from the die cut pack, from the cut apart papers (in their mini versions) and the sticker sheet to embellish my page, along with one of the beautiful copper foiled flairs, and again added a few enamel dots and Nuvo drops in copper for that last finishing touch.


Thanks for reading along, and don’t forget to come and join us on Facebook for challenges and chat in the “Hey Little Magpie Papercraft and Scrapbooking chat & inspiration” group.
