Pebbles, Paper, Scissors
Sorry, I couldn’t resist changing ‘Rock, Paper, Scissors’ to ‘Pebbles, Paper, Scissors’ for my title! This month I got to play with the new Pebbles Inc collection ‘We Go Together’ and it’s a corker.
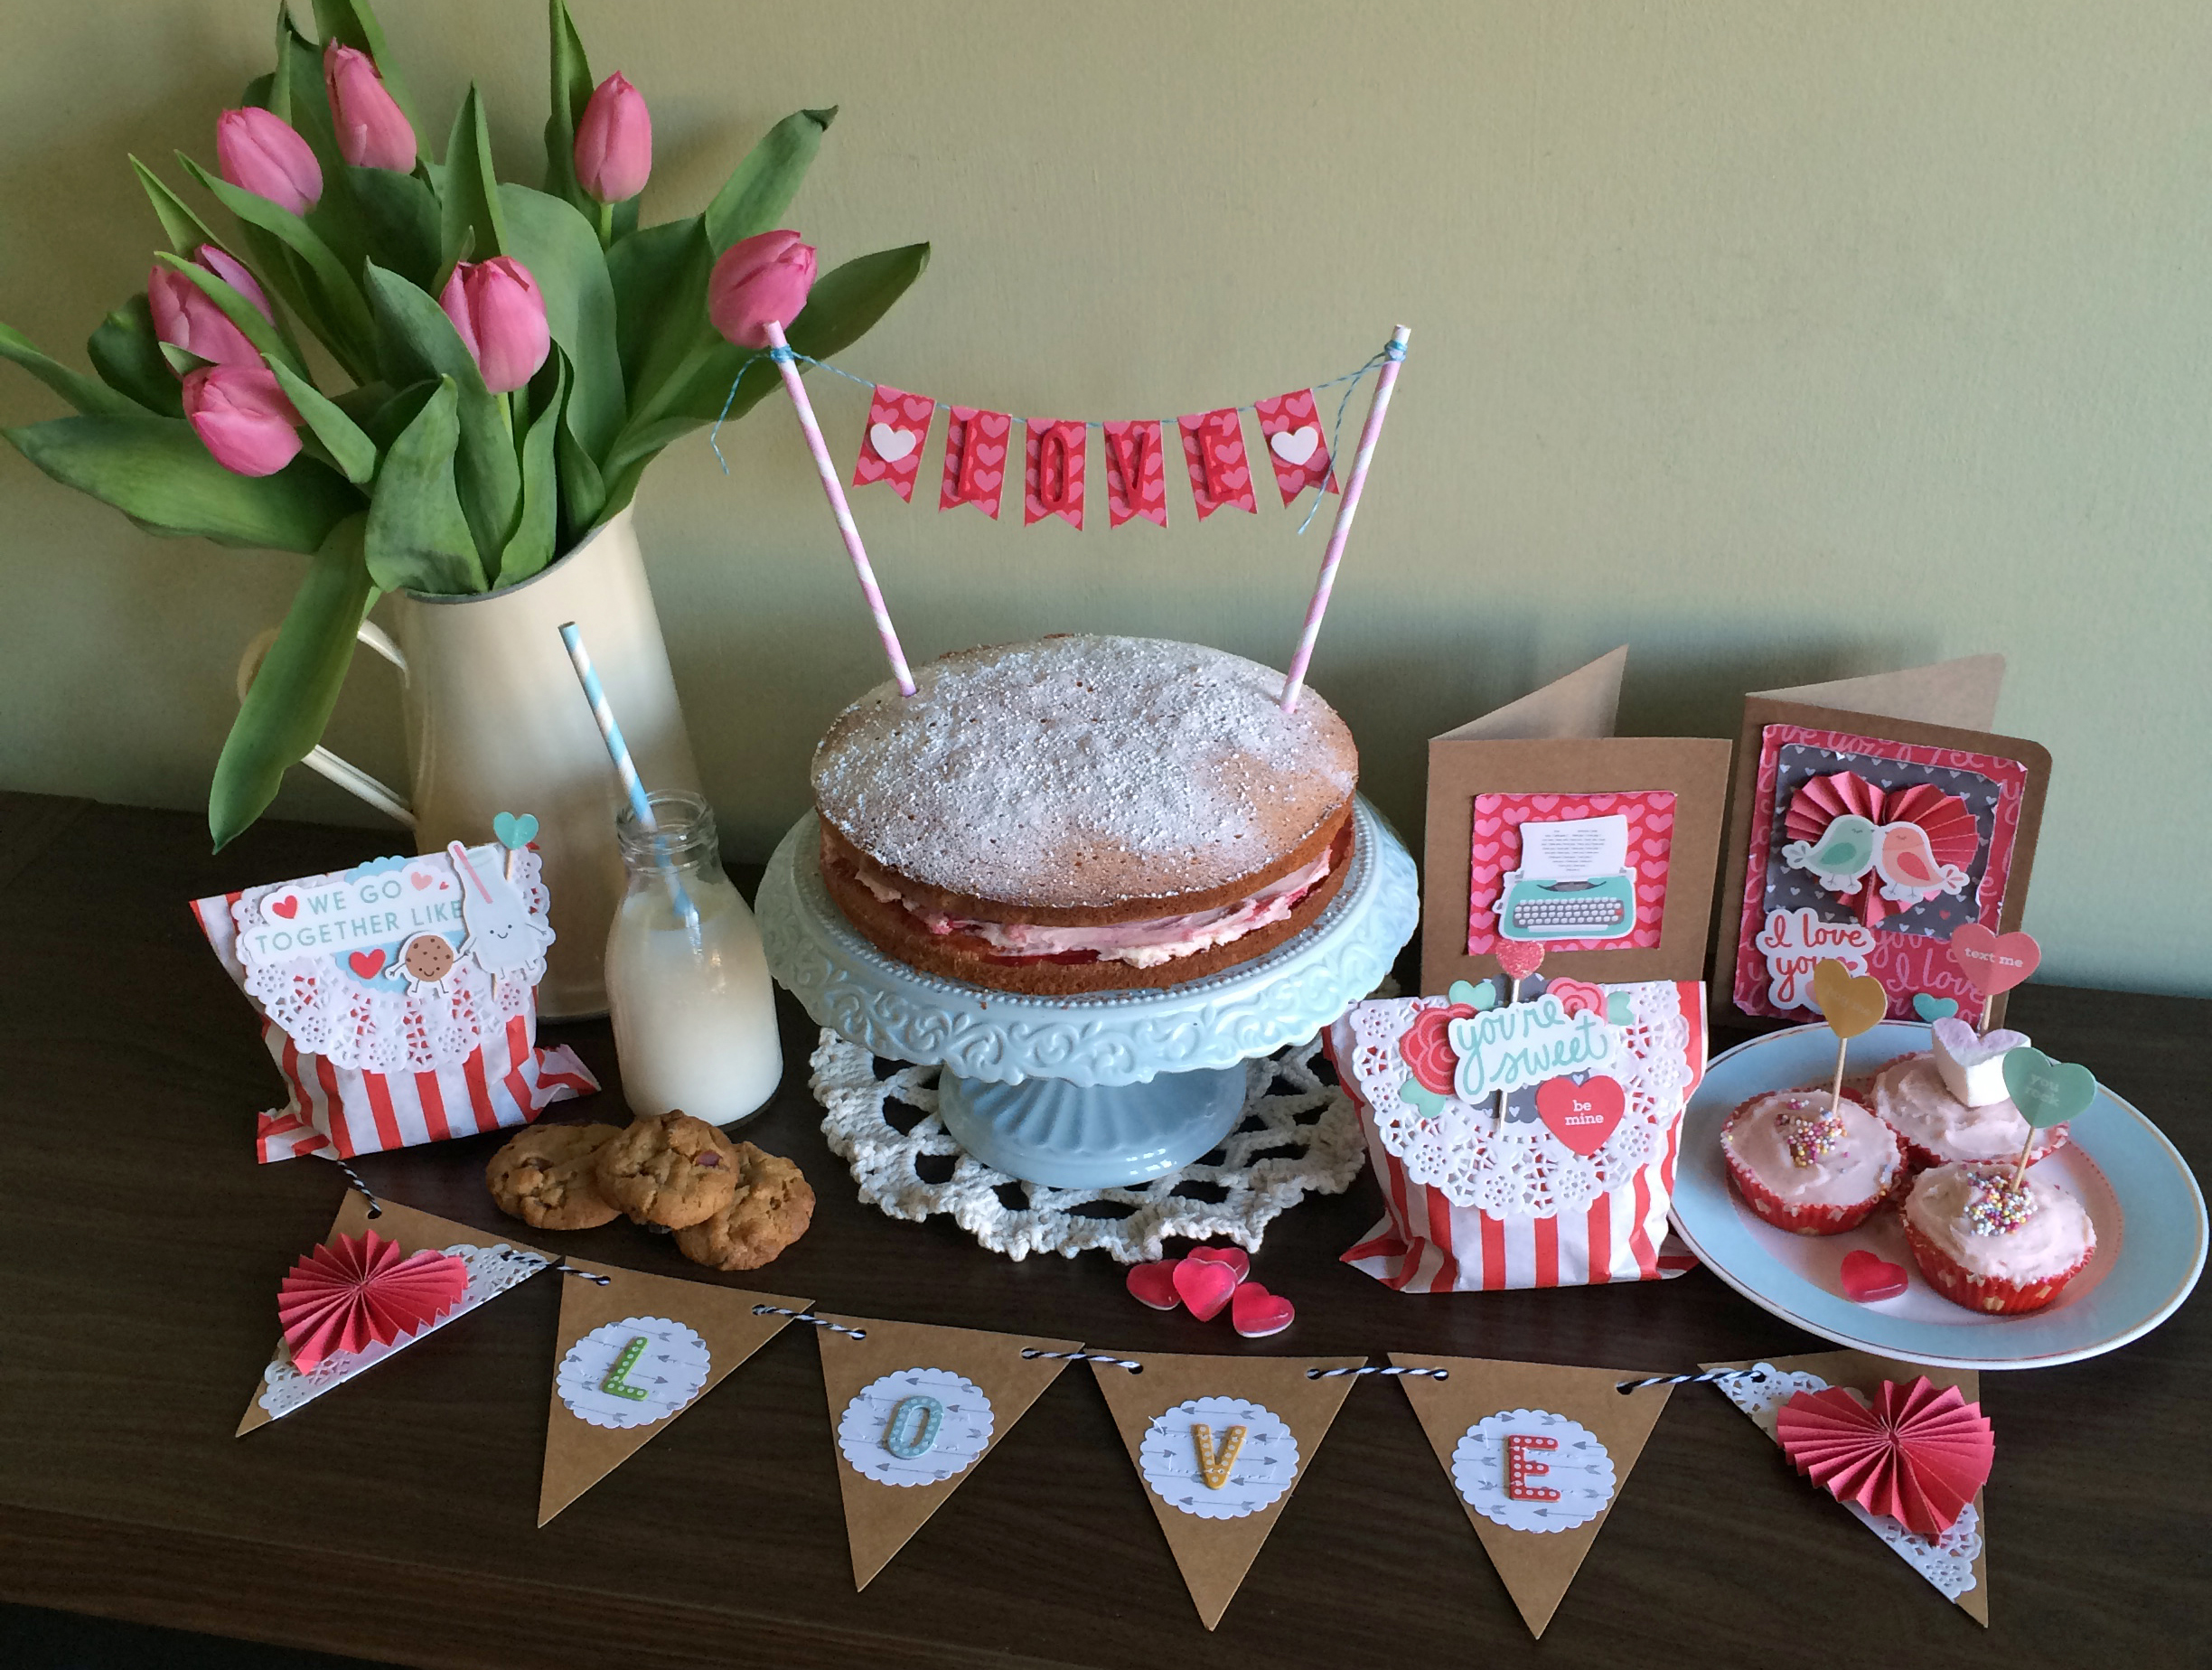
Naturally with Valentine’s Day next Saturday, I made the most of this valentines line in lots of different ways. I made Valentine’s Day cards, bunting, bag toppers, a cake banner and cupcake toppers. Want to see them close up?
Here’s the Valentine’s Day cards. I made two, well I could have made several, but hey I only need two; one for me to give to my husband and one for him to give to me!
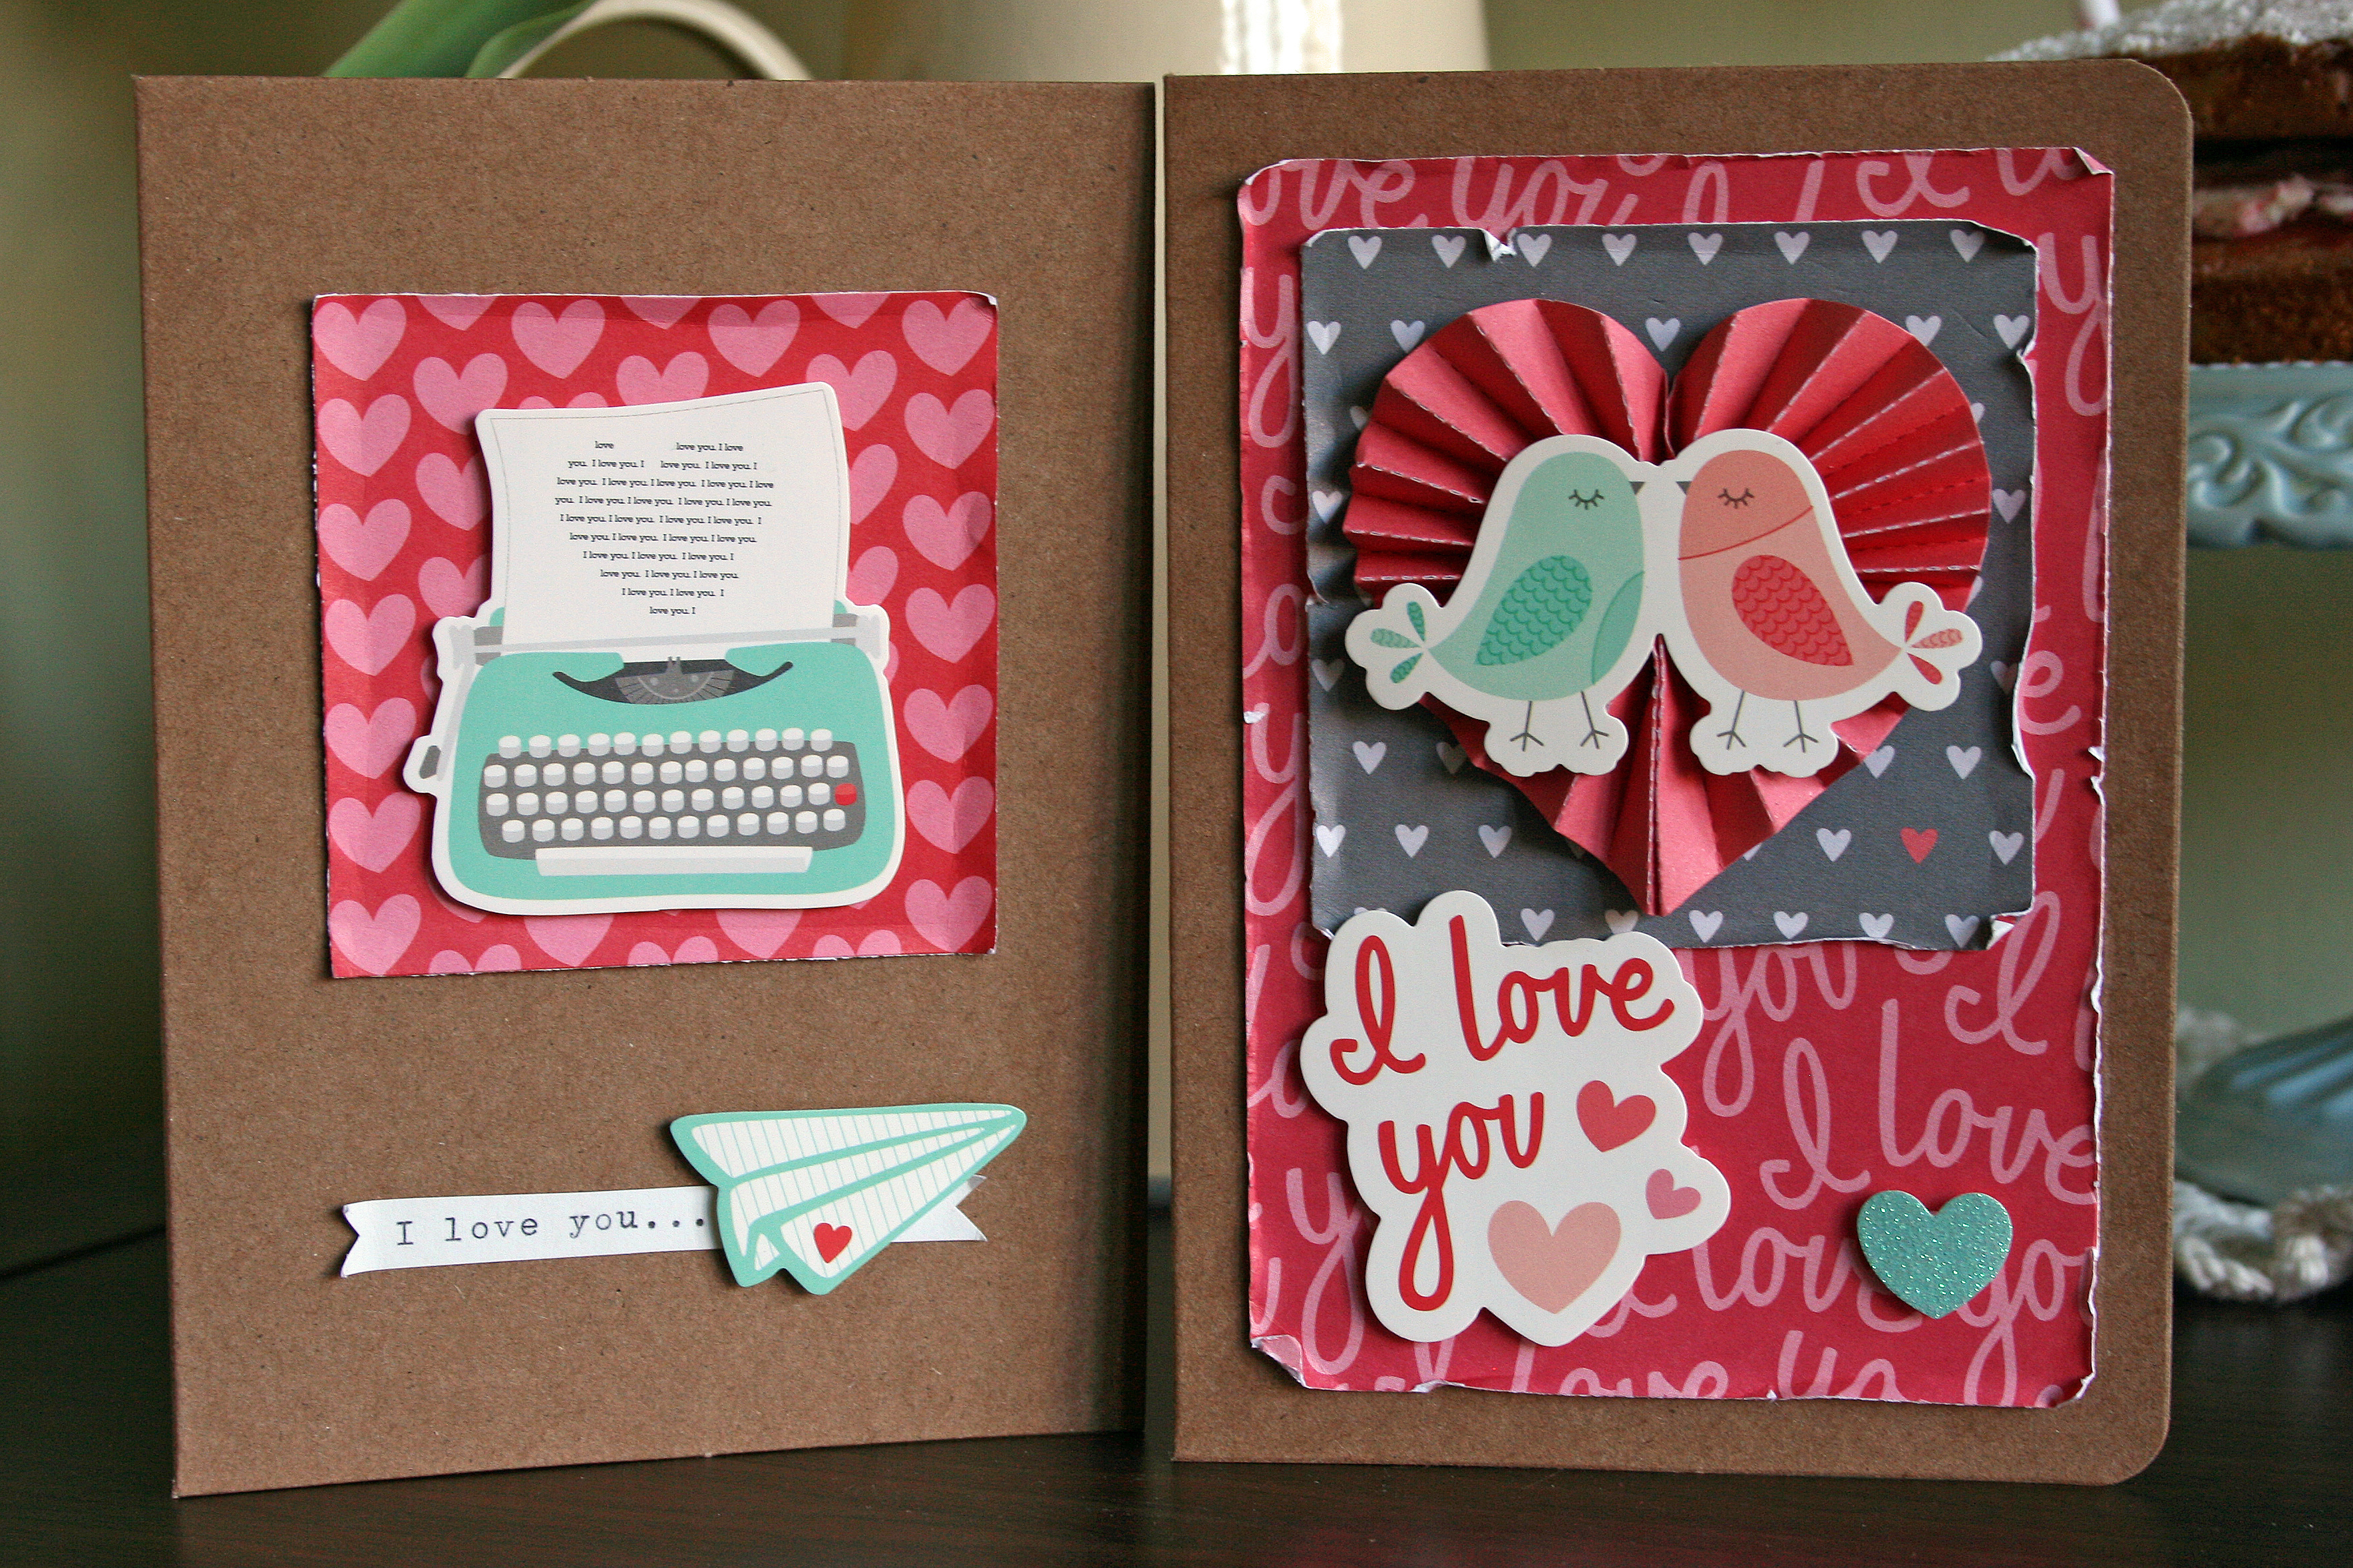
I love those two love birds, how cute are they? The love birds, sentiment, typewriter and paper plane are all from the sticker sheet. I popped the typewriter, plane and sentiment up on foam pads to add dimension to the cards and the lovebirds I stuck firmly to the accordion fold heart with extra sticky double sided tape. There’s some gorgeous papers in this collection, for the ‘Typewriter’ card I used ‘XOXO’ paper with its pretty pink hearts on a red background. I love hearts anytime of the year! For the ‘Love Birds’ card I used the grey hearts paper ‘Budding Romance’ and the ‘I love You’ paper which again has that pink and red colour way, love it. I added a sentiment typed on my vintage typewriter which just so happens to be that same gorgeous turquoise colour and tucked it under the paper plane. To finish off the ‘love birds’ card I added a sweet little glitter heart popped up with a foam pad. I cannot tell you how fantastic those little glitter hearts are, but I’ll try. You get 150 in a pack, yes 150 for £2.99! And not just in this blue, but in a combination of red, pinks and white.
Ok , now I thought I’d move away from the obvious papercrafting and have a little bit of fun. The idea came from the stickers in the ‘Icons & Phrases’ pack and those cute ‘we go together like’ icons. I decided to make some treat bag toppers, attaching stickers on top of a doily and that on to a striped paper bag which I had left over from my son’s party. You’ll see that I use these doilies in another project, I can’t get enough of them and with 25 in a pack for 75p, what’s not to love? Lastly, I attached two glitter hearts with glue dots and little foam pads back to back on a cocktail stick and tucked it behind the stickers.
Here’s the ‘We go together like cookies & milk’ treat bag topper.

and here’s the ‘You’re sweet’ sweetie bag topper.

With this one I added a punched scalloped circle under the stickers to provide a darker background behind the sentiment so that it showed up nicely.
From this I thought about cupcake toppers. So easy to make with patterned paper, a punch and a cocktail stick. These were made with more of the ‘love heart’ stickers from the sticker pack, adhered to the stick with glue dots and a cut out piece of patterned paper on the reverse.

And as my mind had wondered to cake I thought I’d make a cute banner to go on top of a cake.

Seriously, how sweet is that? And completely customisable for your celebration! I added the word Love to the banner because of Valentine’s Day, but you could easily make the pennants smaller to spell a longer phrase or name. You can see the simple process in this photo;

I cut 6 strips of patterned paper measuring 3 1/4 inches long by 1 inch wide and folded them in half. Added double sided tape to the reverse and folded them over a piece of bakers twine. I then added a foam letter sticker (from the same collection) or glitter heart (on a foam pad), cut a fish tail notch into the pennant and tied the twine to a couple of striped paper straws which I already had. Now here’s the ingenious bit; I trimmed down two wooden kebab sticks and stuck them into the cake at an angle and simply slipped the straws over the top! Of course you could tie the banner directly to the kebab sticks if you don’t have straws.
My final project for this month features another banner, or bunting as we British call it. I used the DIY Shop Craft Banner Kit (3.5″ x 4.5″) which is in the sale at £1.99 (there’s several different types and sizes still available at reduced prices). I punched 22 2″ scalloped circles from the reverse side of the ‘Hugs & Kisses’ paper and adhered these on to the front of the pennants with repositional adhesive. I attached chipboard thicker letter stickers and ran them through my sewing machine to make sure that the letters were securely attached. I don’t want them falling off the bunting because I want them to last for years.
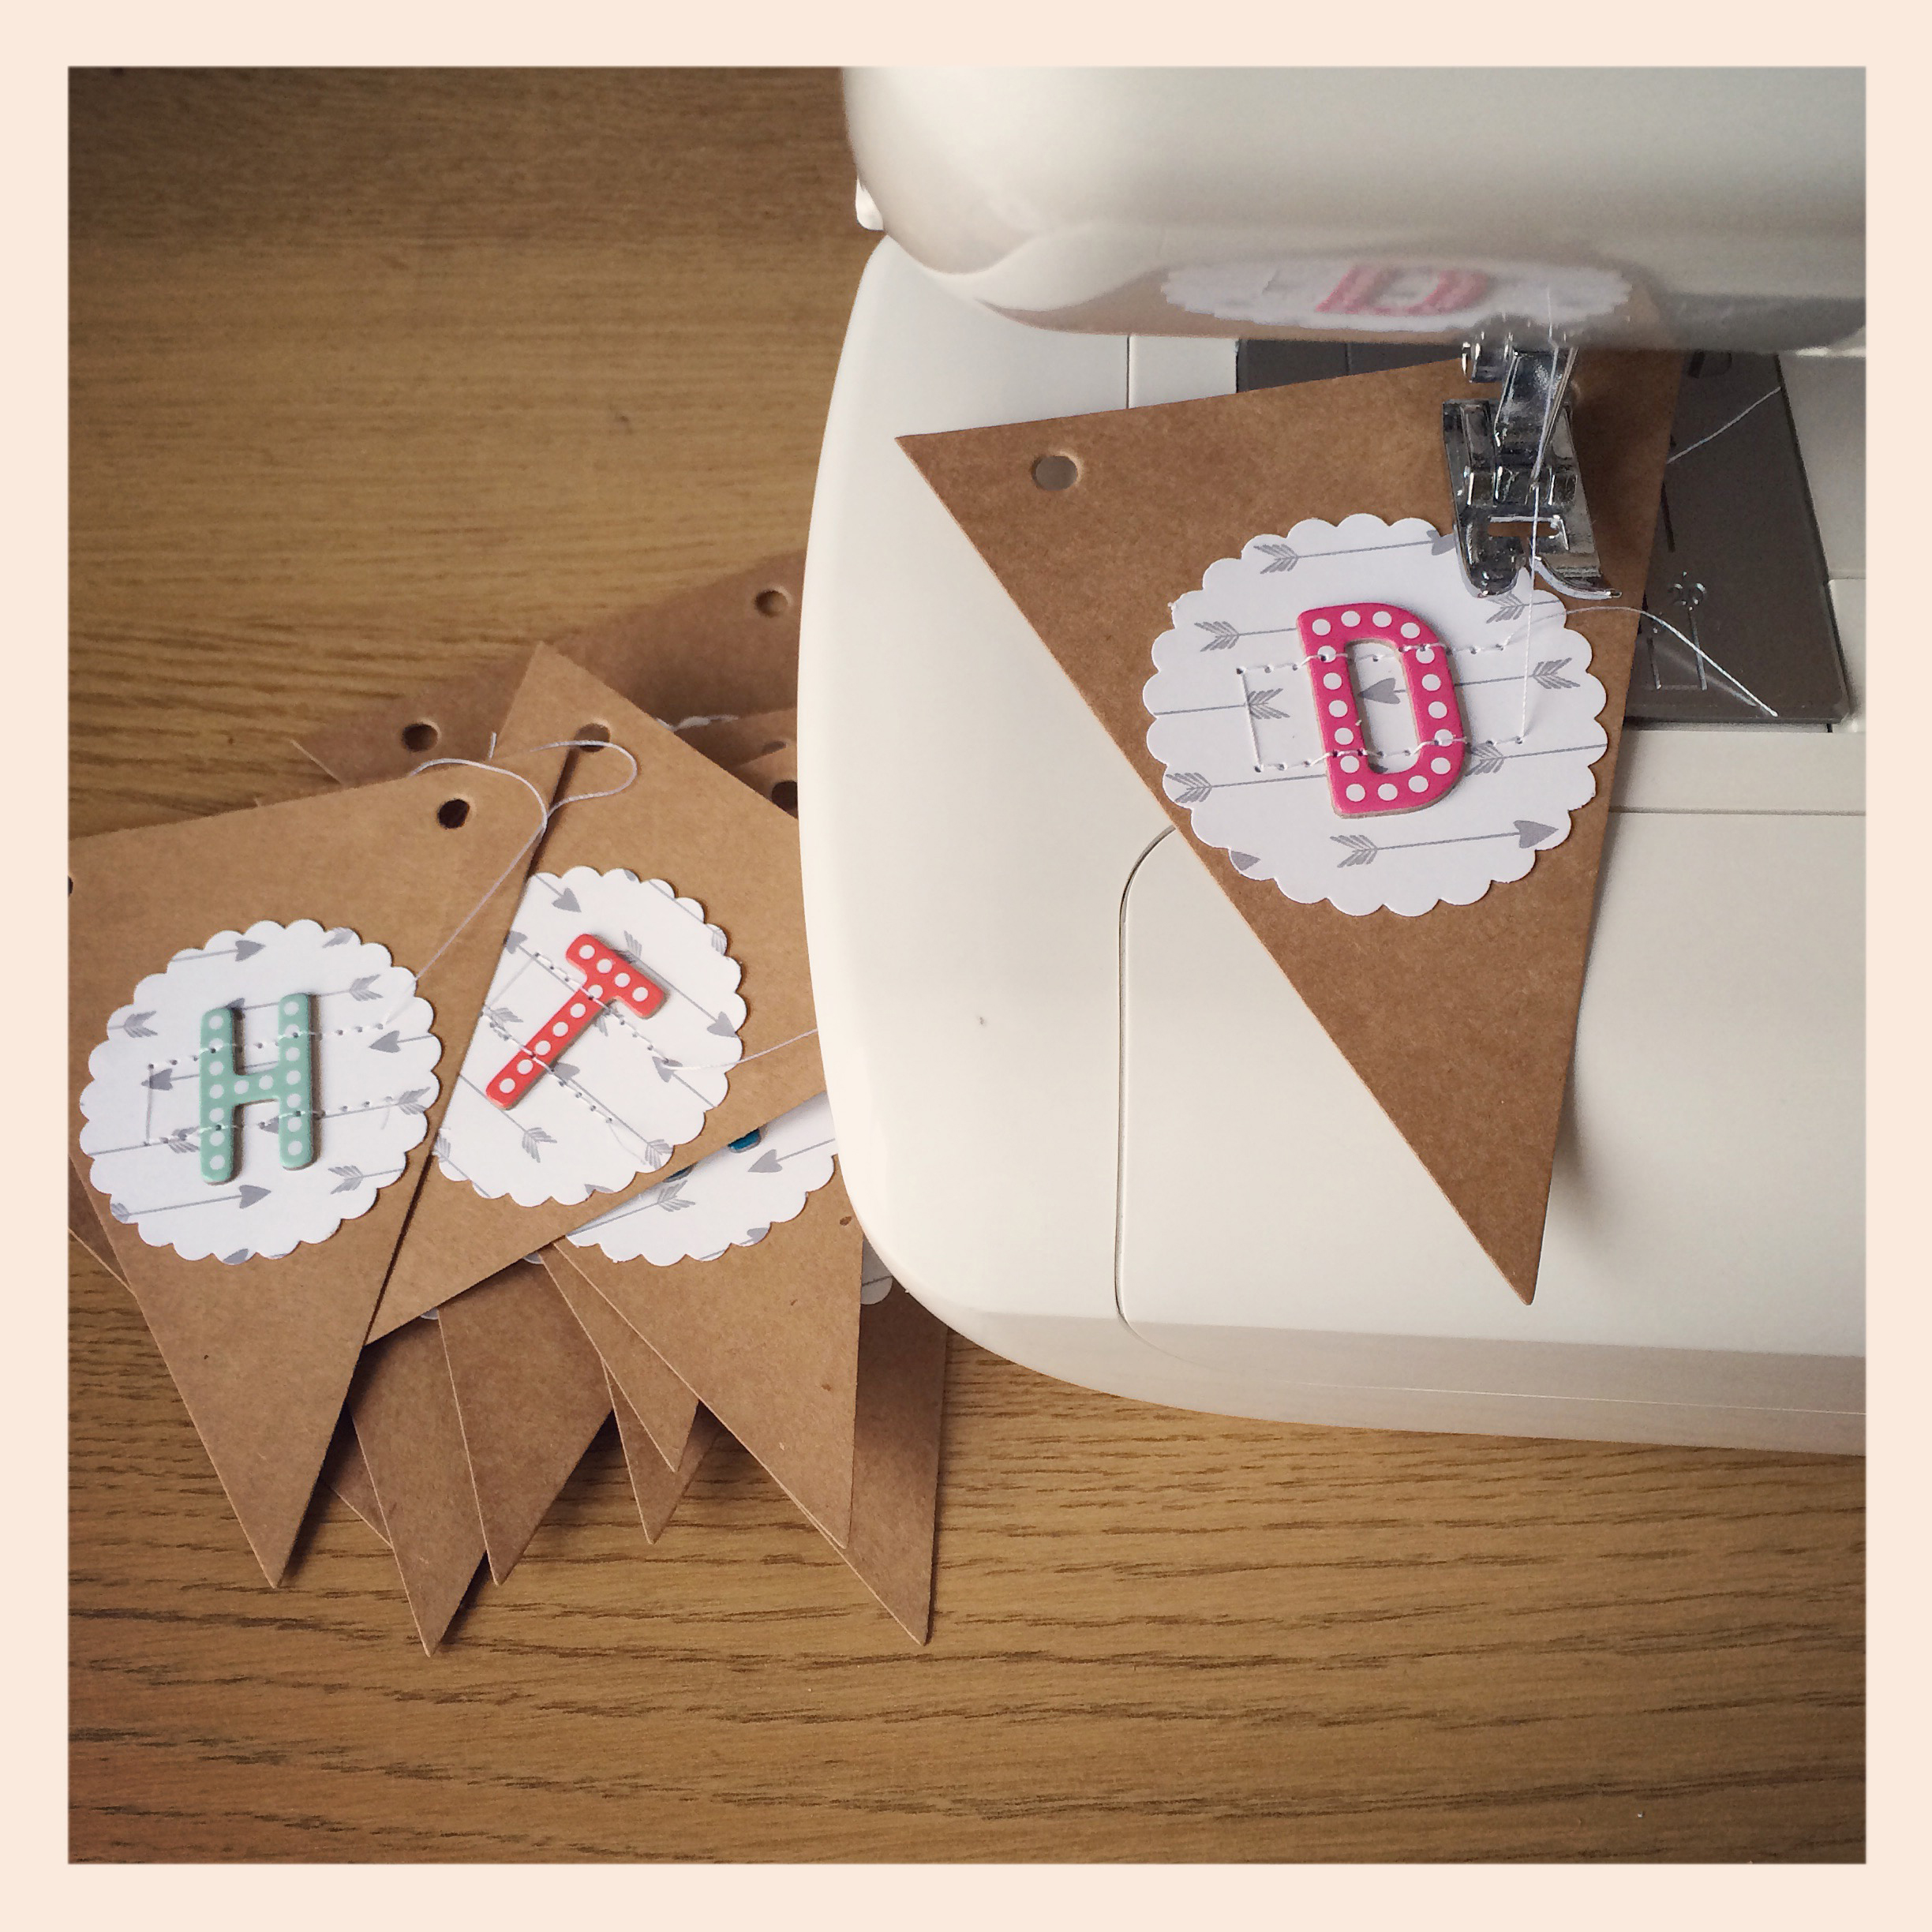
I used the Pebbles ‘Birthday Wishes’ multi-coloured chipboard thickers because I planned to get the most out of my banner kit and the variety of colours in this letter pack was perfect. You see I planned to make bunting that would spell out ‘HAPPY VALENTINES DAY’, ‘HAPPY BIRTHDAY’ or simply ‘LOVE’ and that left 2 pennants free to use as spacers between the words. For these I adhered half a doily (as used earlier) to each of the remaining pennants and attached an accordion fold heart on top. Finally I threaded the pennants on to the bakers twine which came with the kit, working out how much I needed for the longest phrase and this handily gave me enough spare to trim off and use for the small ‘Love’ banner.
Here’s the ‘Happy Valentines Day’ banner (its pretty long so it was hard to photograph).

The ‘Happy Birthday’ banner.

and the ‘Love’ bunting.
If you would like to make this with the 24 pennant pack I used then you’ll need to make the following letters;
A x 3, B x 1, D x 1, E x 3, H x 2, I x 1, L x 1, N x 1, O x 1, P x 2, R x 1, S x 1, T x 1, V x 1, Y x 2, Heart x 2
If you didn’t want to make valentines bunting you could use those extra 5 pennants to add a number for a birthday (for example 10th) and insert it into the ‘Happy Birthday’ bunting.
Well, I hope I’ve given you lots of ideas on how to use your supplies in different ways.
See you next month!
